Years ago, when I created this page, the goal was clearly to write something about how to take the best possible photos of one's fish and aquariums. However, I quickly found out that it is not that easy, which many of my photos unfortunately bear witness to all too clearly. I therefore had to first learn some basic techniques, and test some options with aperture, shutter speed, and macro settings versus zoom. Here is what I have found out so far.
Good advice on taking aquarium photos with a digital camera
Aquariums can be difficult to photograph and the fish are even harder. Glass reflects flash light and easily gives reflections across most of the image. The fish move all the time and the camera has its work cut out keeping the sharpness at its peak.
Remember the following (the short version - the long one follows below):
- Avoid scratches and similar if possible
- Ensure clean glass - remove coatings inside and polish the front pane outside
- Ensure there are as few impurities in the water as possible
- Use a high aperture value (f8.0 or larger if possible - it gives greater depth)
- Use an external flash placed on top of the aquarium as far as possible
- Alternatively, use multiple light sources over the aquarium and turn off the camera's flash
- If you have to use a flash, hold the camera at an angle to the glass
- Use the camera's macro function
- Zoom is good, but watch out for camera shake - large zoom lenses are hard to hold, especially in poor lighting conditions
- Be patient - many shots must be taken to get a really good one
More ways to approach things...
Decide which photos you want to take and how - do you want photos of a specific fish or a specific aquarium, or do you just want to fire away and see the result afterwards. Both methods are actually useful, and even though the first is the most structured, I have taken many photos that I personally think are good just by snapping away when the opportunity arose, but I have also many times cursed over a razor-sharp image where you can clearly and distinctly see lime spots or scratches on the front pane. 
A photo session and prior preparations
Regardless of what you choose, there are certain preparations you can make.
Clean the aquarium.
Ensure the aquarium is as clean as possible, i.e., as little suspended matter as possible and a clean front pane inside and out. This can be achieved by cleaning the filter and changing 1/3 of the water the day before. At the same time, clean the glass inside and polish the outside - repeat the outside polishing an hour or so before you start photographing. When you polish the panes, look for scratches and other things that cannot be removed but are visible to the naked eye. Mark the worst places with colored tape and choose some spots where the scene is to your liking and there are no scratches in the way. When you take the photos, the tape will remind you not to shoot right in front of the largest scratch in the aquarium, which one can otherwise easily forget once you've started (alternatively, you could also just make sure to only have new aquariums, but I don't have the money for that myself).
Plan a time.
Ideally, plan the session for the evening when it is dark outside and make sure to feed at least 3-4 hours beforehand or wait until you are finished photographing. If you, like me, have aquariums standing opposite each other, it can be a good idea to turn off the light on the aquariums behind the aquarium you are currently photographing so that there are no reflections from the light in the front pane. The darker it is around the aquarium and the brighter it is inside the aquarium, the better - then there are no light sources that can be reflected from the glass. Also check that you are not wearing anything that can be reflected in the glass; it could be a zipper, a watch, or generally if you are wearing clothes that are too bright.
Consider lighting.

Another general detail is that when photographing entire aquariums, an extreme amount of light is required, as the aquarium "sucks in" the light. On my camera, the flash power can be increased, and it is a major advantage if you want to show an entire aquarium - even if all the light in a room is turned off, it is still difficult to illuminate an aquarium completely without some form of extra light.
Prepare the camera.
When everything is ready (including the water…), take the camera and sit comfortably in front of the aquarium. The camera (with a fully charged battery and empty flash memory) should usually be set to macro so you can get close to the subject, but you can certainly take photos without macro - the fish just won't fill as much of the photo. If the camera has aperture priority (usually designated as program A and means you set the aperture fixed while the camera calculates shutter speeds), it is a good way to ensure depth of field in the image by setting the aperture to somewhere between 4 and 8 and then letting the camera set the shutter speed. Many cameras can also set the ISO (the sensitivity of the "film", which means you can take photos in less light) and on my camera, ISO 200 is quite a bit easier to use than the camera's automatic setting, as the shutter speed becomes faster and the subjects less blurred. 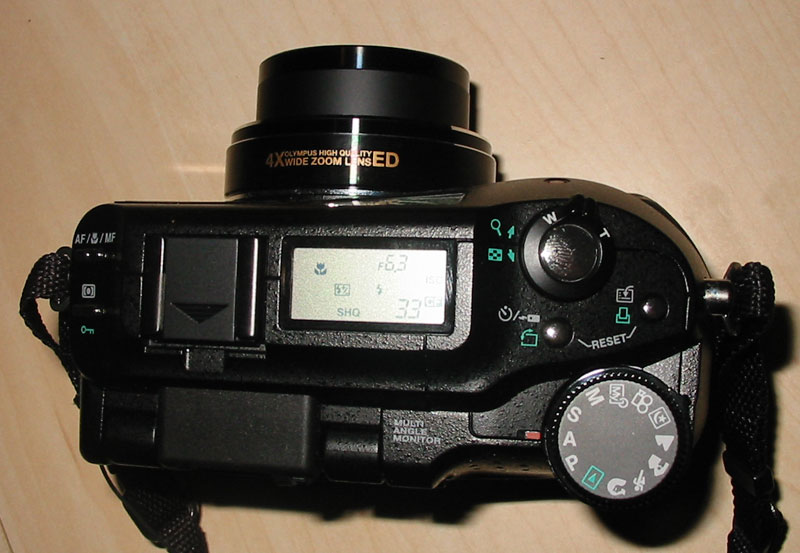
Select the subjects and snap away.
Now it's about waiting for the right subjects, and occasionally taking a few of the less right ones too, and otherwise just filling up your flash memory with a lot of photos; feel free to take 5-10-15 or even up to 20 photos of each scene, as you never know if something was wrong with the first 5 or 10. When the flash memory is full, it should be emptied onto the computer and you can do a quick rough sorting and possibly assess if there are any scenes that need to be retaken, or if you are missing any fish or areas of the aquarium that you intended to include. Then you can fill your flash memory a few more times, since you've already made all the preparations anyway.